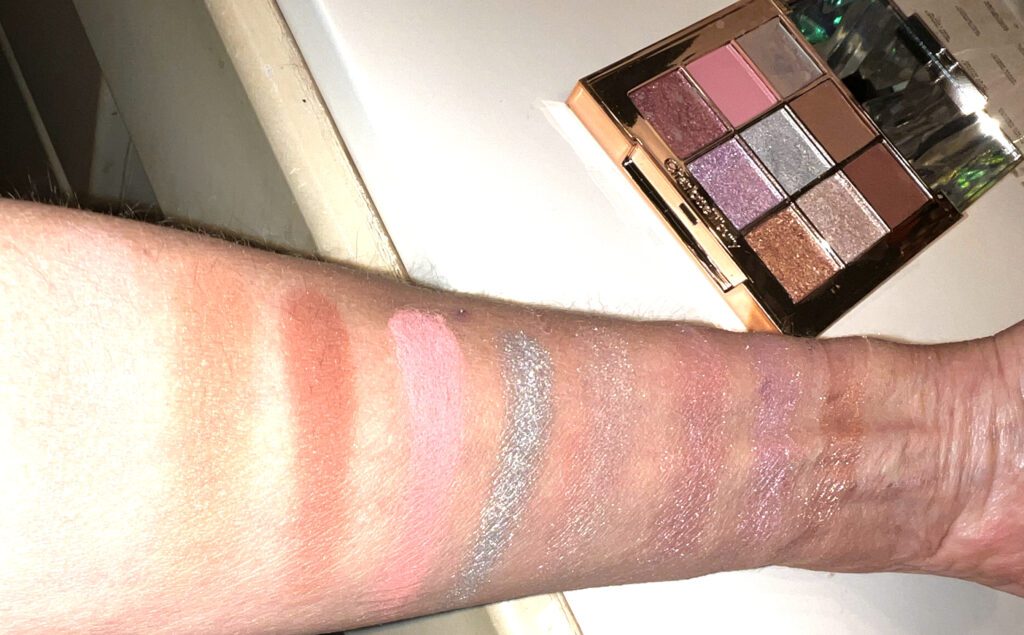
Charlotte Tilbury Holiday 2023 Beautyverse Palette
The Beautyverse Palette screams Glitz and Glamor, inside and out, For The Holiday Season! Beautyverse is not your average ho…
Recent Color Striping Blogs

With so many color choices, how do you find the perfect foundation for your face? Color Striping. using foundation to make a stripe from above your jawline to the bottom of your neck is the ultimate way to choose your perfect shade. So, once you know your undertone, the next step is to choose a few foundations, in your shade range, to match your foundation to your undertone., For instance, choose three foundations that are in your shade and undertone range. Your shade is somewhere between very fair, fair, light-medium, medium, medium-tan, deep and dark. However, you can’t stop there.
Now you need to choose the shade range that has the slightest hint of your undertone shade. And, your undertone shade is either a warm, cool or neutral tone. Furthermore, warm undertones have yellow or golden tints. Cool undertones have yellow tints, and neutral undertones have neutral shades. Most important, foundations have different levels of yellow and pink undertones. The reason is, the right undertone level doesn’t mean it is the right level for you. Hence, choosing the right foundation for you can be overwhelming. Hence, Color Striping is the ideal way to choose your exact shade.. So, let’s do this!
One of the most important things to remember is you match your foundation with your undertone. Therefore, do not match your surface tone, the color of your face, or you will look like you are wearing a mask. Your neck is where you’ll find the true undertone to match your foundation.
And, never match foundation on the wrist, hand, or arm. As a matter of fact, most people’s hands are an entirely different shade than their face color.
Don’t pick foundation if you have makeup on. Take all your makeup off before Color Striping, or at least take off the makeup from above your jawline to your neck.
The most important thing is, don’t rush. To buy the perfect foundation, give yourself some time.
First, before you Color Stripe, make sure you have no makeup on, and your face is clean.
If you need to take your makeup off in the store, afterwards make certain that you prep your skin as you would do at home. For example, if you wear a primer, then put a primer on. After you remove your makeup, your face can become too dry. Therefore, you’ll need put the hydration back into your skin. So, put a moisturizer on! If you don’t hydrate the area you are going to swatch, your skin will be thirsty.
Another important tip is you want to create the exact conditions, on the area you are going to swatch, that your skin would actually be at home when you apply foundation. As a result, your skin will react to the foundation in the store, in the exact way you expect it would at home.
Additionally, swatch the foundation using the same tools you would use at home. For instance, if you do not apply foundation with your fingers, then don’t apply the swatch with your fingers. On the other hand, if you lay your foundation with a brush, then use a brush. Furthermore, if you use a beauty blender, then use a beauty blender. O.K., now you are ready to Color Stripe.
First, start with the side of your face. Begin on the side of your mouth above the jawline,close to your chin, ,
Next, using either your finger or a concealer brush. starting above the jawline, draw a line using the foundation from your face to the bottom of your neck.
Finally, look for differentiation in the stripe from your face to your neck. The color should match the undertone of your skin, which you will see on your neck. If it is too yellow, or too pink, then you need to try another shade. In fact, I would use at least three different shades to find an exact match. The actual skin on your neck should look real, and natural. So, you are looking for the right undertone, and the right depth of color.
Next, wait for at least five minutes for the foundation to dry. The reason to wait for the foundation to dry down is it will oxidize. In order to explain oxidizing, when a product hits oxygen, it will break the product down. This occurs as a result of the product, when it hits the air, looses one electron. As a result, the product will get darker. To illustrate, when you cut an apple open, and the inside flesh hits the air, the flesh turns brown. Hence, the color of the foundation also looses an electron when it hits air, and will become darker.
Another tip is liquids, even matte liquids, bounce light back when it dries down. Therefore, it is important to allow the foundation to dry so that the bounce back disappears and the foundation dries to the true state of the formula.
Last, lighting can have a huge affect on the way your foundation looks on your skin. First of all, the fluorescent lighting in the stores can never replace natural sunlight. Therefore, it is important that you see what the foundation looks like in natural sunlight. So, you must look at yourself outside. In this way, you can make sure the formula and the color of the foundation works for you.
Finally, choosing the right foundation shade takes more time than choosing a lipstick, eye shadow,bronzer, highlighter or blush. However, if you do the work, you will have the perfect foundation. And, having the perfect foundation will create the perfect canvas for the rest of your makeup application.